Unity is a 3D development platform, and as such requires 3D capable hardware. Fortunately, you don't need a high-end workstation to use the Unity Editor, as many affordable laptops are enough. It's difficult though to tell in advance whether your machine will handle the Unity Editor comfortably. The best way is to try it on a scene similar to the one we will be developing.
Steps Overview
- Download and install Unity Hub
- Create a Unity ID account
- Install the latest version of Unity (minimum 6000.2.12f1) via the Hub
1. Download and install Unity Hub
There are many versions of the Unity Editor, and several optional components. Some of the features are not compatible across all the variety, and managing different installations manually is tedious. The Unity Hub is designed to facilitate this management.
Download the Unity Hub for your operating system, and install it according to the instructions on the Unity website.

Create a Unity ID account
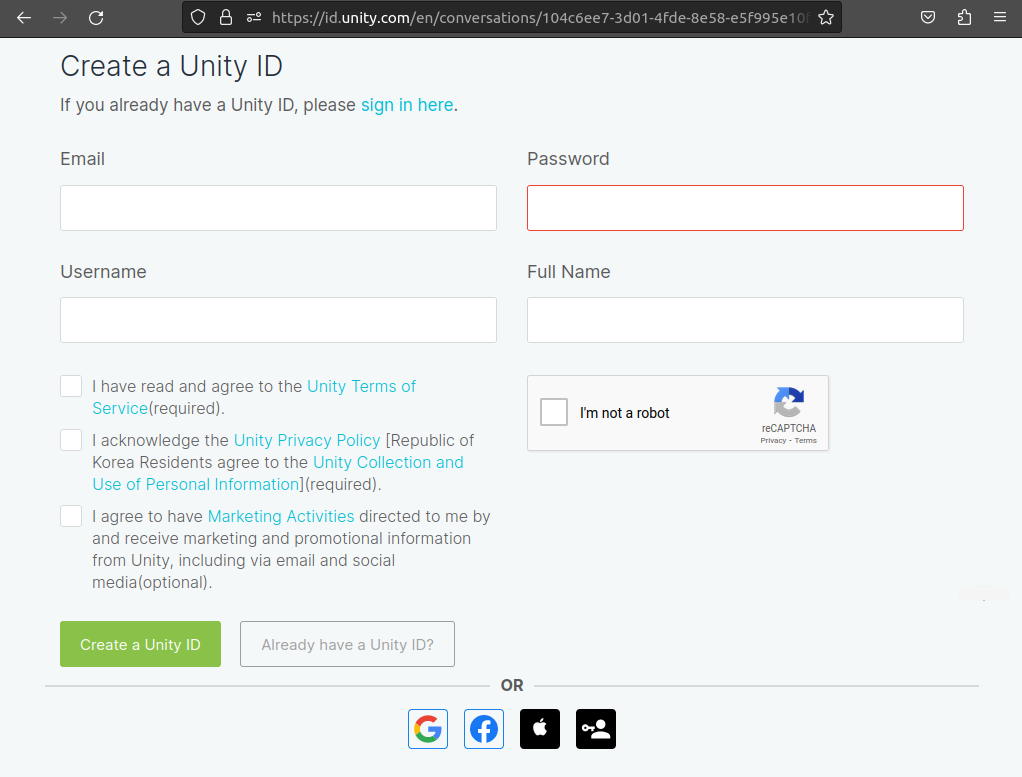
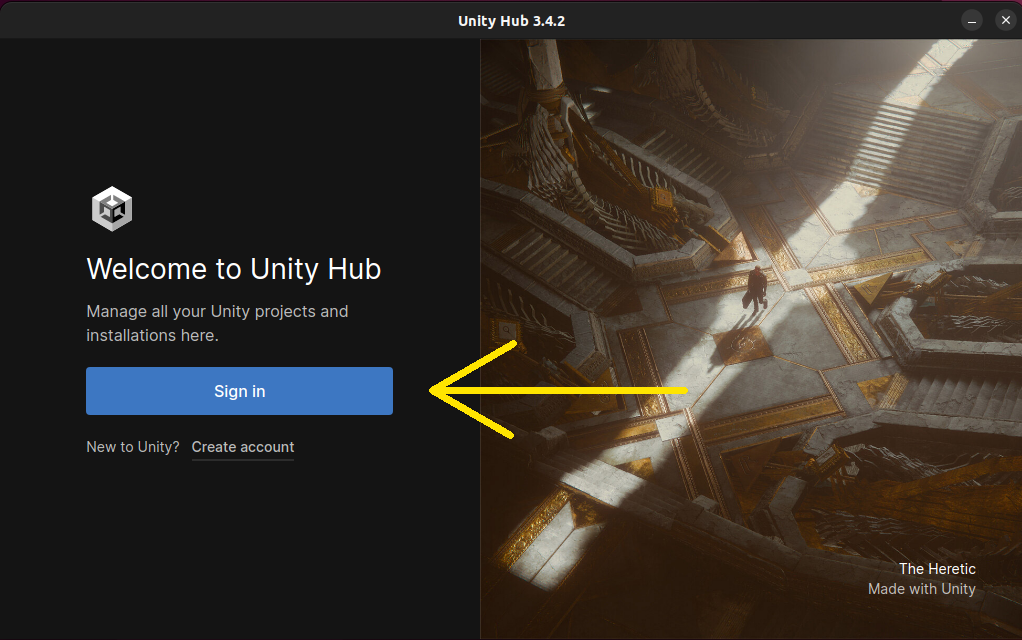
Start the Unity Hub app. You will be greeted with a welcome screen with a link that will bring you to a web form where you can create your Unity ID account. Click on the link, a proceed according to the Unity ID website instructions.

Fill in the registration form and click on the link in the confirmation email, you will be taken to a login page and to your account page in the web browser. Alternatively, you can use your Google, Facebook, or Apple accounts to login using the buttons at the bottom of the login form page.
Go back to the Unity Hub app and click on "Sign in"
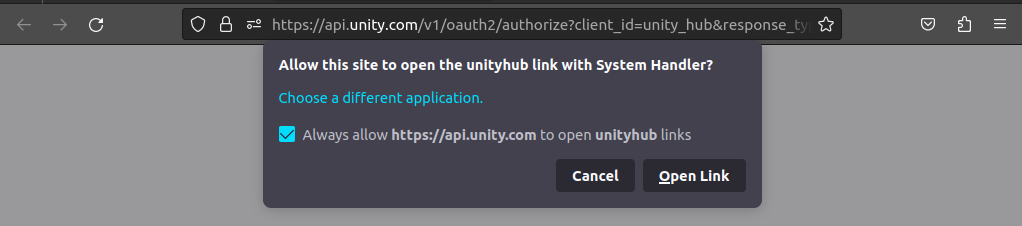
You will be taken back to your browser where you might need to allow the unityhub link type to be opened in the Unity Hub app. Allow your browser to do this.
This will take you back to the Unity Hub app. Confirm the welcome screen, and you should be given an option to install the Unity Editor itself.
Install the latest version of Unity via the Hub
After you complete the Unity ID account creation step, Unity Hub should offer you to install the latest version of the Unity Editor.

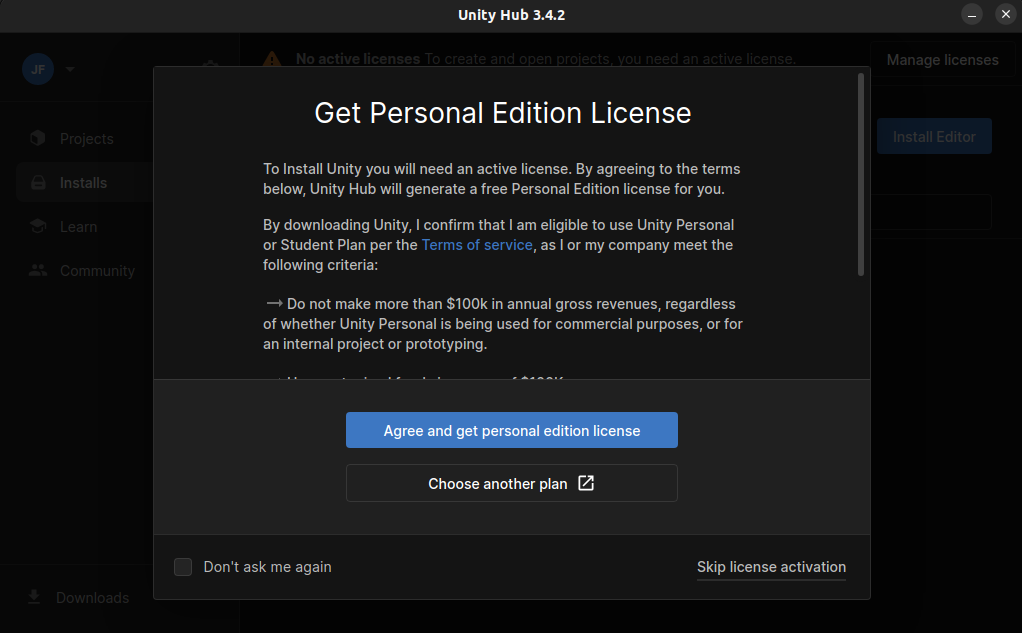
Get a free personal license by clicking on the appropriate button.
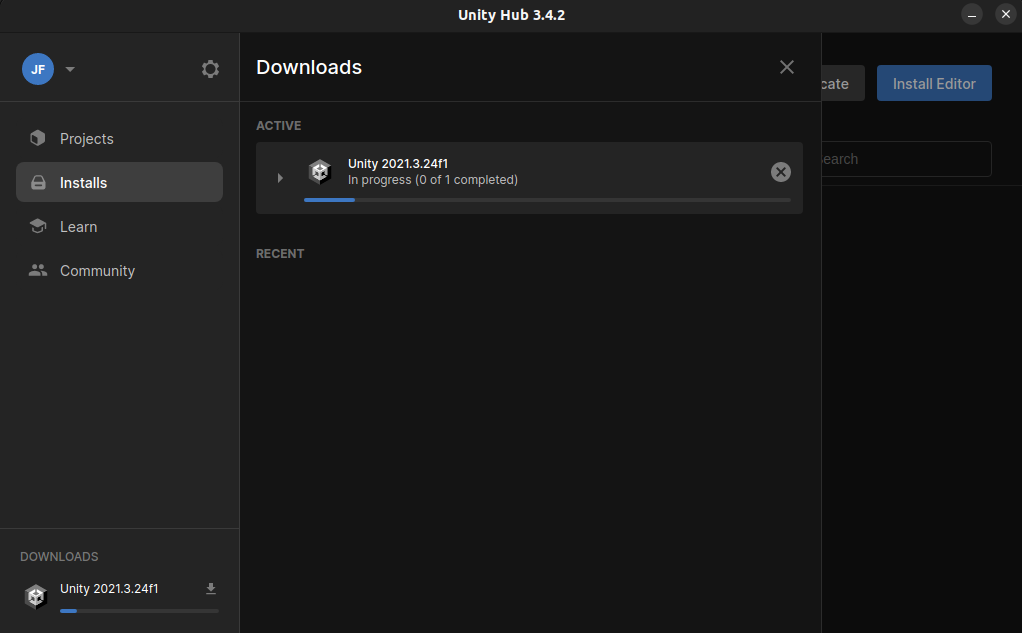
And wait until the Unity Editor is downloaded and installed. Make some coffee or tea, this can take a long time, up to several tens of minutes.
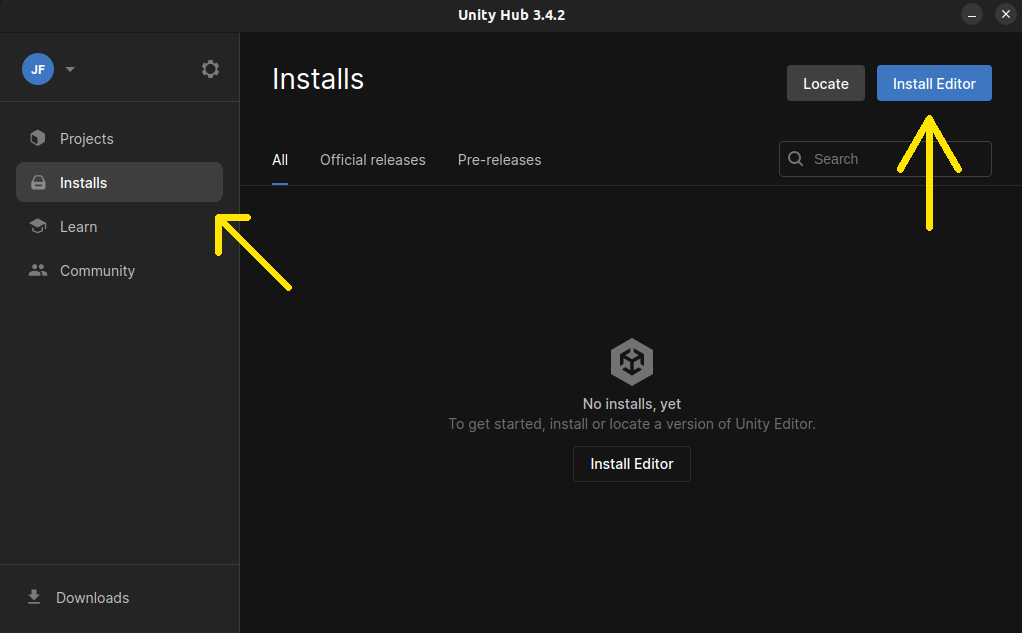
Alternative—Install Later
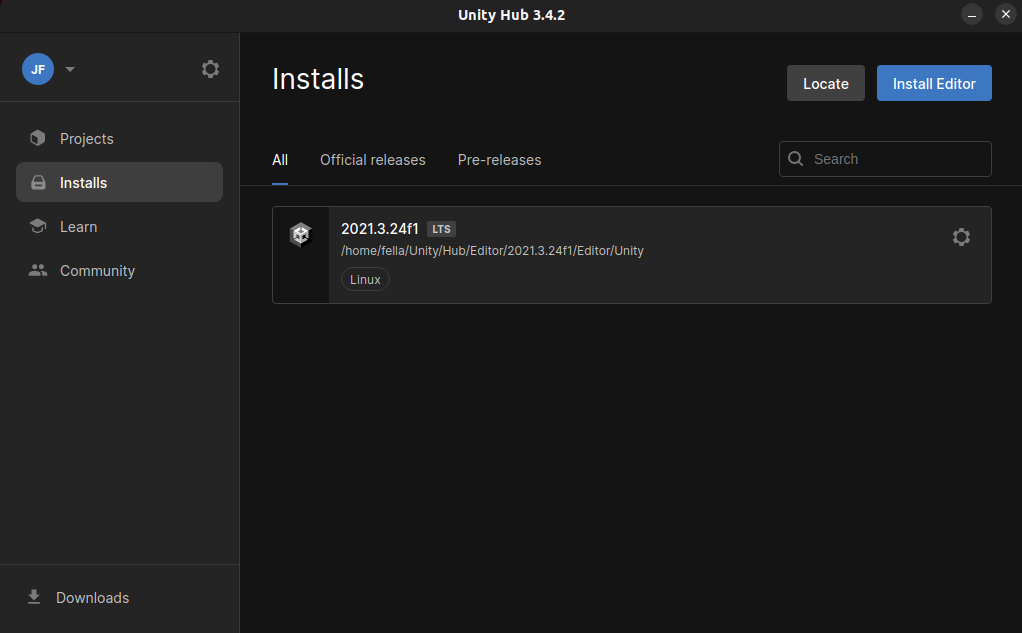
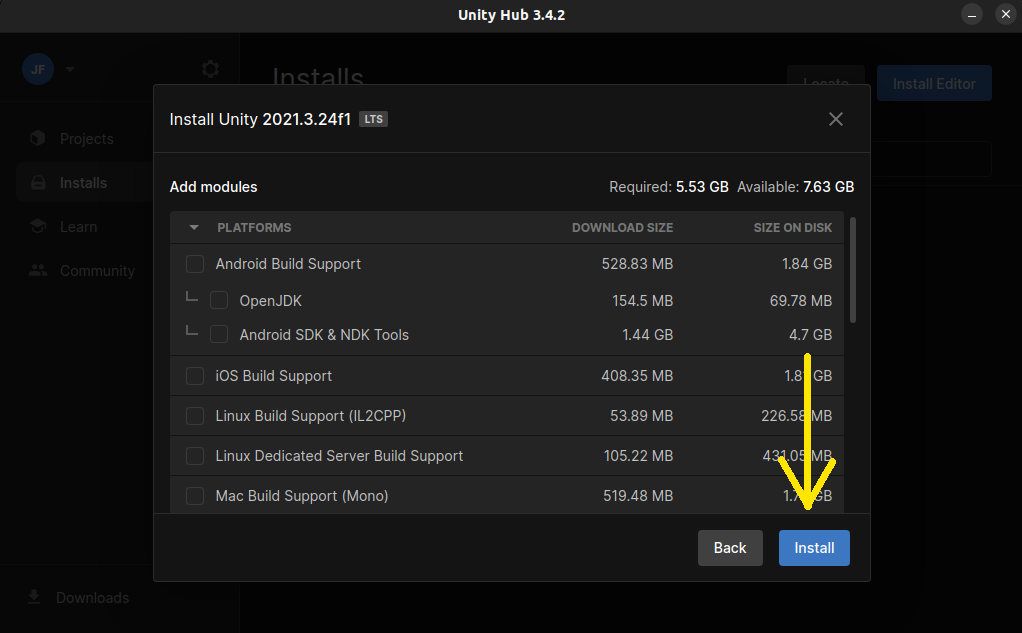
You can also install the Editor through the Hub later by clicking on the "Install Editor" button on the "Installs" tab.
Select the recommended latest LTS version.
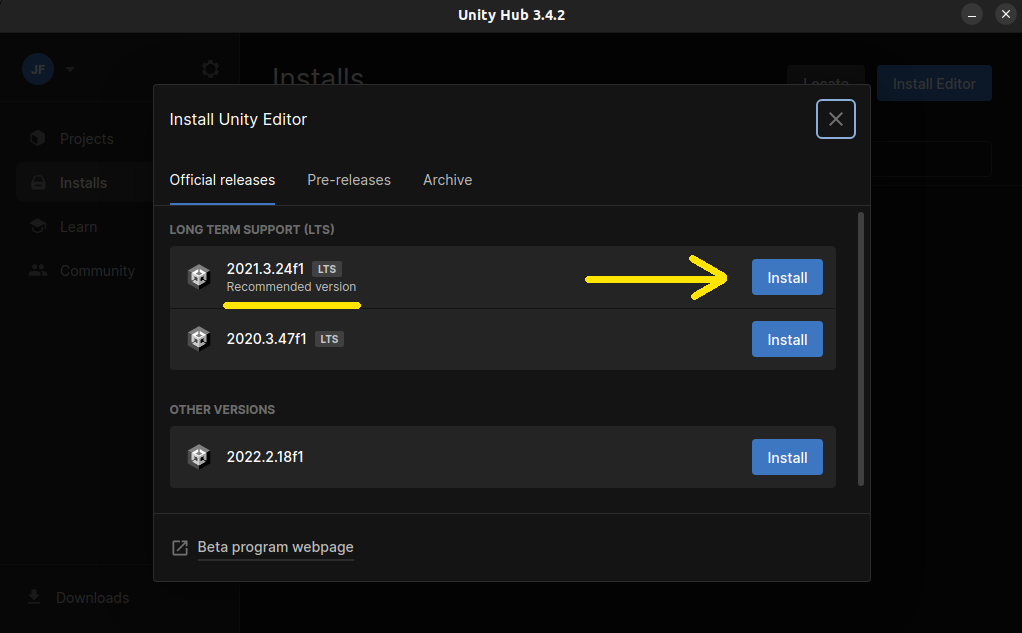
Proceed with default installation by clicking on "Install". Everything necessary for development on your platform is already included in the defaults.
Installation complete
After a successful installation, you should see your chosen Unity Editor version on the "Installs" tab.